Getting more from SwiftUI Previews
 Zach Waugh •
SwiftUI previews are one of the biggest advantages of SwiftUI to me, enabling you to build new UI almost as fast as you can type (when they work…). It really can’t be overstated how much creating UI without needing to do a build-run loop improves the developer experience. Besides building the UI though, one thing I rely on previews for is testing how a component looks during a variety of states, especially when those states are difficult or tedious to test manually.
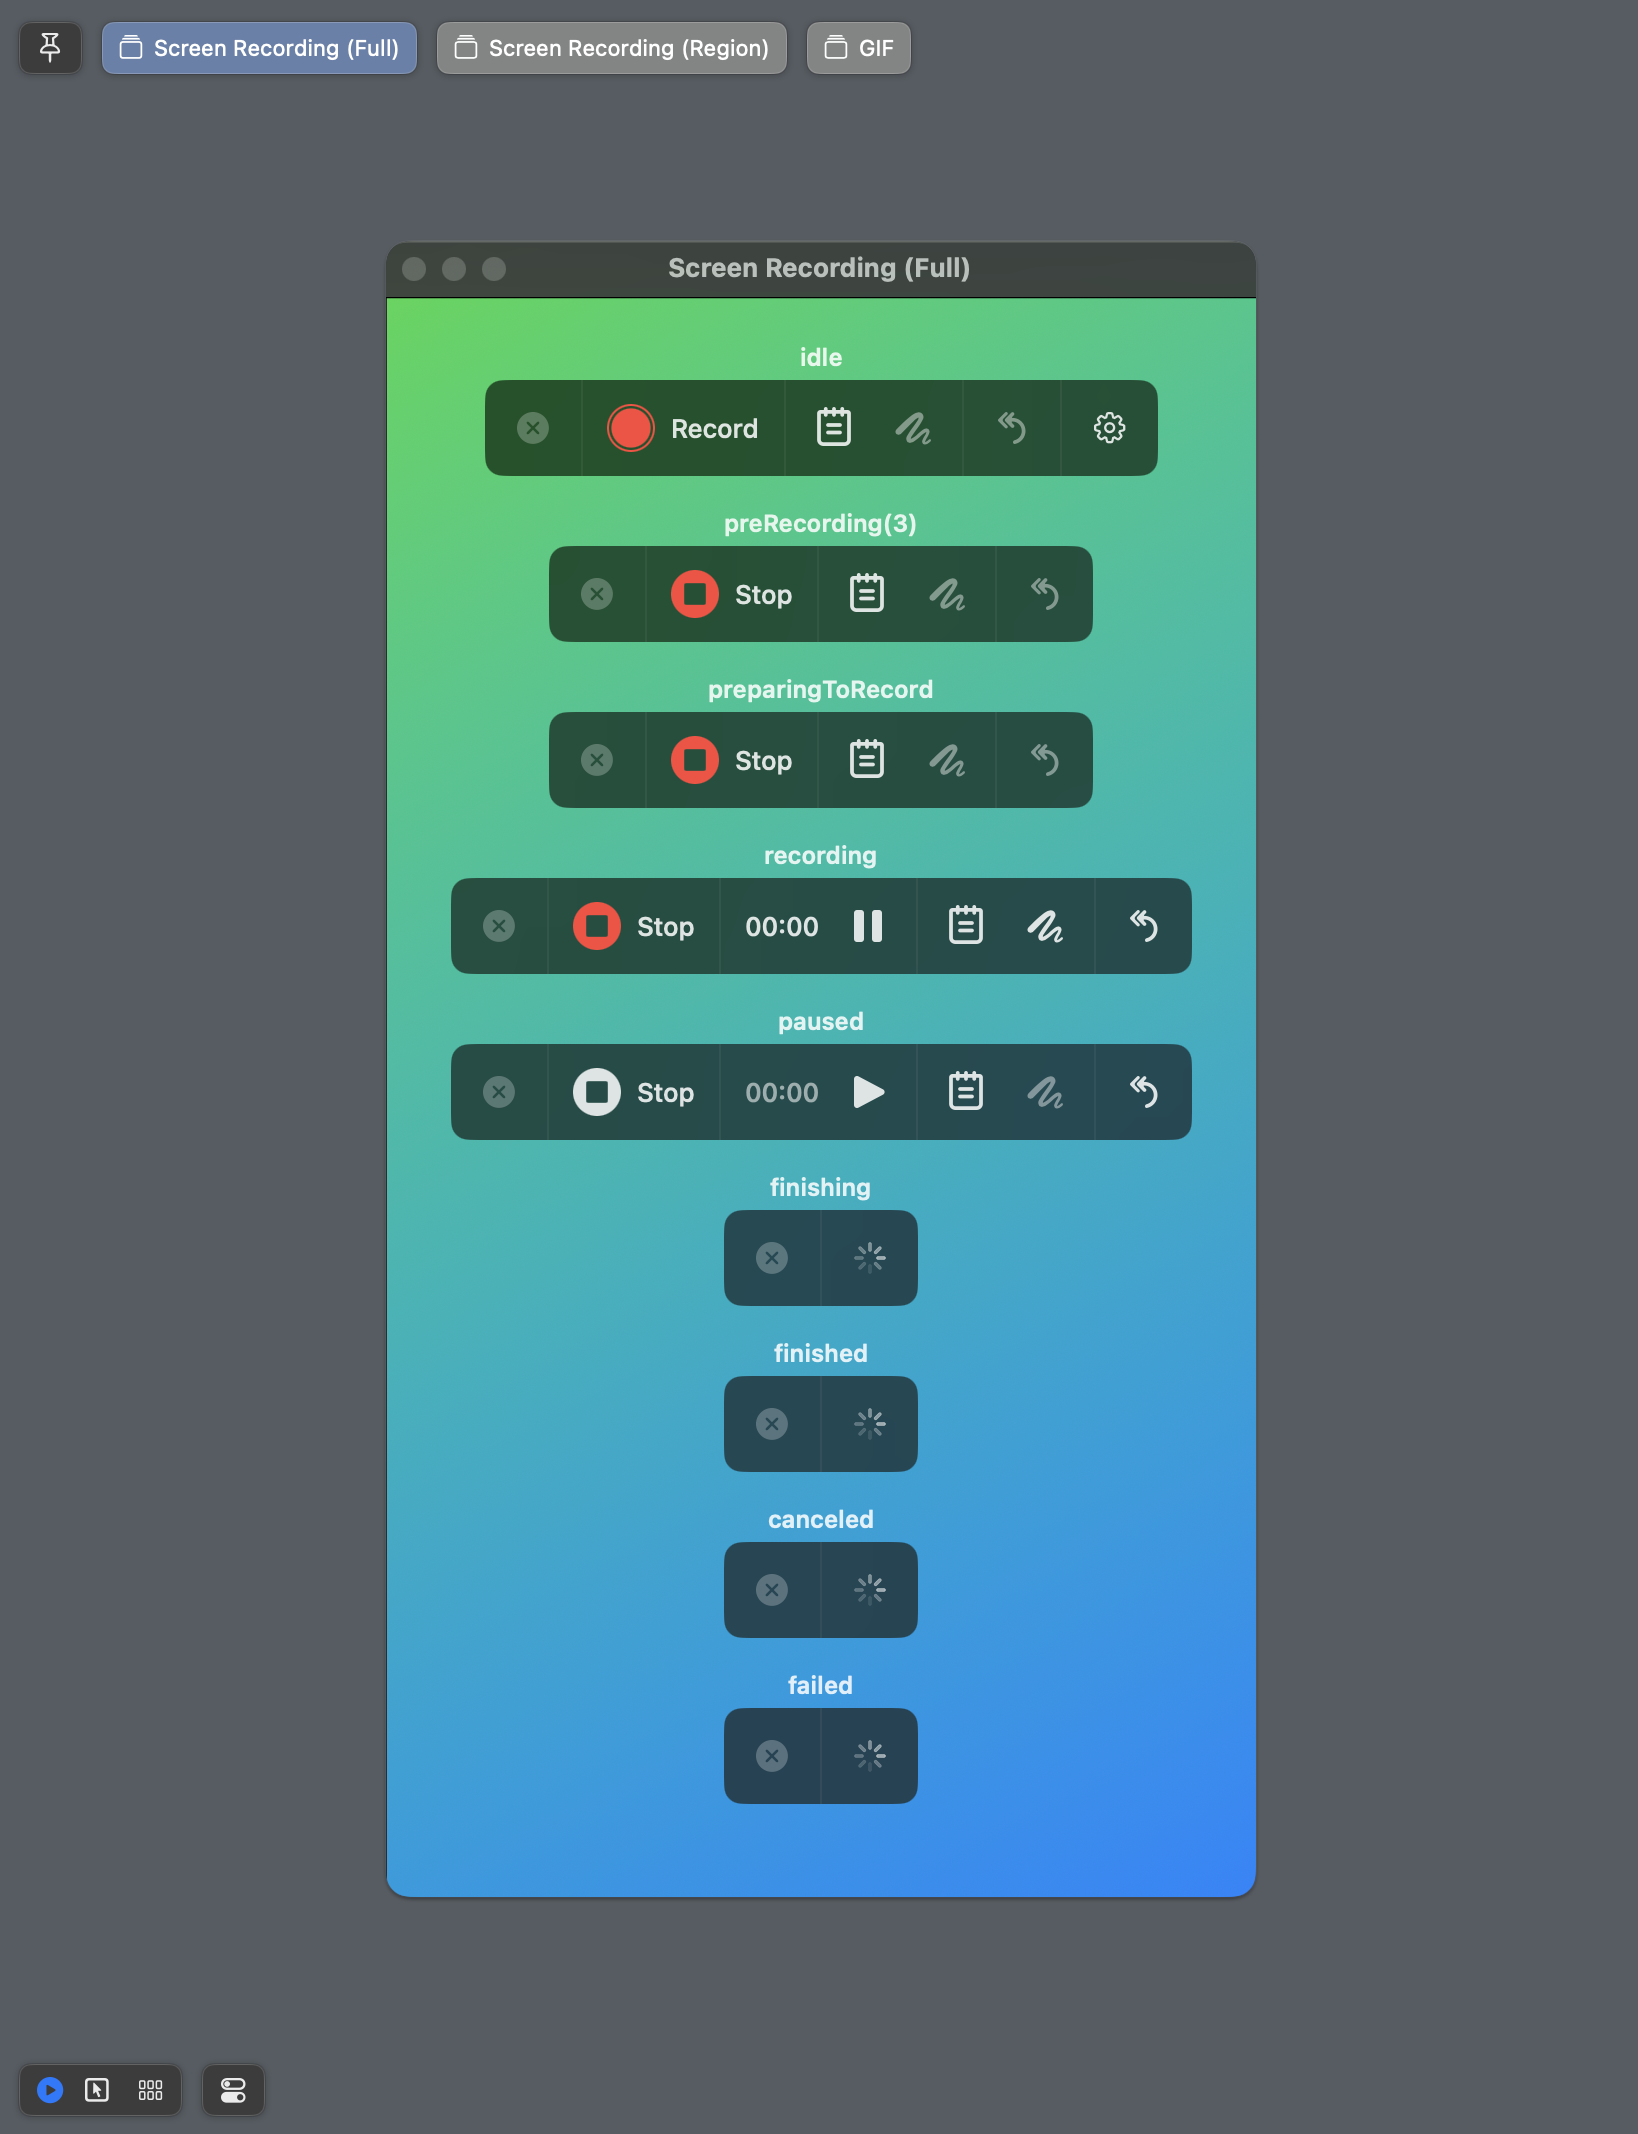
Here’s a real-world example. At Rewatch, I build our screen recorder for macOS. The screen recorder has multiple different modes (Full-screen, region, window, GIF, etc), and for each mode it can be in a variety of states. With all the possible permutations, it can be difficult to ensure the toolbar looks good in every state and be sure that changing something in one state doesn’t break another. SwiftUI previews give us a few built-in tools for viewing some of these states, like the color scheme variants, but don’t nearly cover all the cases.
Luckily, we can do whatever we want. There’s nothing to prevent you from arranging your views in whatever way suits you best. What I like to do for a component like this which is fairly small (in pixels) is to customize the preview to view all the states at once. Here’s what this looks like in practice:
The code for this isn’t really important as the concept, but here’s what it looks like for anyone curious.
#Preview("Screen Recording (Full)") {
    controlsPreview(mode: .screenFull)
}

#Preview("Screen Recording (Region)") {
    controlsPreview(mode: .screenRegion)
}

#Preview("GIF") {
    controlsPreview(mode: .gif)
}

@ViewBuilder
private func controlsPreview(mode: ScreenRecorderConfiguration.Mode) -> some View {
    let states: [RecorderState] = [
        .idle,
        .preRecording,
        .preparingToRecord,
        .recording,
        .paused,
        .finishing,
        .finished,
        .canceled,
        .failed
    ]

    VStack(spacing: 16) {
        ForEach(states, id: \.self) { state in
            VStack(spacing: 4) {
                Text("\(state)")
                    .font(.system(size: 12, weight: .semibold))
                ScreenRecorderControlsView(
                    store: Store(initialState: ScreenRecorder.State(
                        recordingState: state,
                        mode: mode
                    )) {
                        ScreenRecorder.failing
                    }
                )
            }
        }
        Spacer()
    }
    .padding(32)
    .background {
        LinearGradient(colors: [.green, .blue], startPoint: .topLeading, endPoint: .bottomTrailing)
    }
    .frame(height: 800)
}
This makes a VStack of toolbar views, one for each state I care about, and now I can clearly see all views at once, and easily add/remove states as the design evolves.
A few things worth mentioning:
- Viewing all states of every mode in one preview would be too much, so I break them out into their own top-level
#Previewto make things a bit more manageable and can focus on a single mode at once. - For each preview, I have a helper function that loops through all the states that the screen recorder can be in and adds a view with that state and the label.
- This toolbar is typically rendered as the content view of a window on top of the macOS desktop, so I just add a colorful gradient as the background to approximate a wallpaper and get a better idea of how it will look in production.
- The finishing/finished/canceled/failed states are all temporary states. Once we hit any of those states, we’re going to immediately close the toolbar window and transition to a different view, so we just show an indeterminate progress indicator. We could skip rendering these entirely, but I like show them to ensure we don’t break them, even if they are only displayed briefly.
- I use The Composable Architecture for this and all my features, which I can’t recommend enough. The
ScreenRecorderreducer controls the state that drives this view and is well-tested, so this is more about ensuring the UI looks good.
This setup has been hugely beneficial for building and iterating on this type of UI. When we need to introduce or change a button, I can hop on a call with a designer or share a screenshot and instantly see all the states and where we might need to make a tweak and would be easy for a designer to jump in directly and make any changes, feeling confident they didn’t break anything.